My first ever post on DIY/Arts and such!
Well well well, graduation season was upon us for the past couple of months whether you’re in Asia, US, UK, Australia etc. (“was” being the operative word here). Kicking myself for this slightly off timing post… (oh, the potential for more views!)
As I am one year behind my friends and graduating class because I opted for a one-year placement (internship), a sandwich degree, I used some free time to make some handmade graduation cards to congratulate and wish them luck for their future endeavours! Sure, how old am I, and who still MAKES cards huh? It’s just something about a personalized gift and handmade card… it’s my way of showing my sincerest wishes and love, and it always makes me warm and smiley after making them =) I’ve adopted this habit since I was little really (everyone in my family probably has at least 5-10 handmade cards from me!), as I attended weekly arts and craft classes.
Although, the thing about cards… I am well aware that not everyone is as sentimental (hoarder) and might not keep it. So, I try my best throughout the years to make really creative and sometimes useful cards – that could double as a photo frame, a bookmark… or at least worthy of being a decorative piece in their room/home.


ENOUGH chit chat about the sentiments behind handmade cards, now let me share some graduation cards I’ve made this summer:
*Most of the main ideas of these cards were inspired from other online sources as cited and credited (Unfortunately, I’m not that innovative booohooo)
-
Graduation Cap Spring Card
I actually had an idea in mind for this first one: I wanted to create a 3D perception that my friend has on a 3D graduation cap for this card. Looking up “graduation hat pop-up card”, I came across this spring card which I think would be great for what I had in mind.
Idea from: Strictly Stampin
Materials:
Tassel (or make one from thread with this youtube tutorial from Kin Community here)
Round Black Button (or wrap one with black ribbon/painted black)
Black Craft Card (5 ¼” x 10 ½”)
Colour Paper (of your choice for inner part of card)
Glue or Double Sided Tape
Process:
The formation of the spring card is pretty simple, just a few folding steps as shown in this tutorial by Split Coast Stampers here).
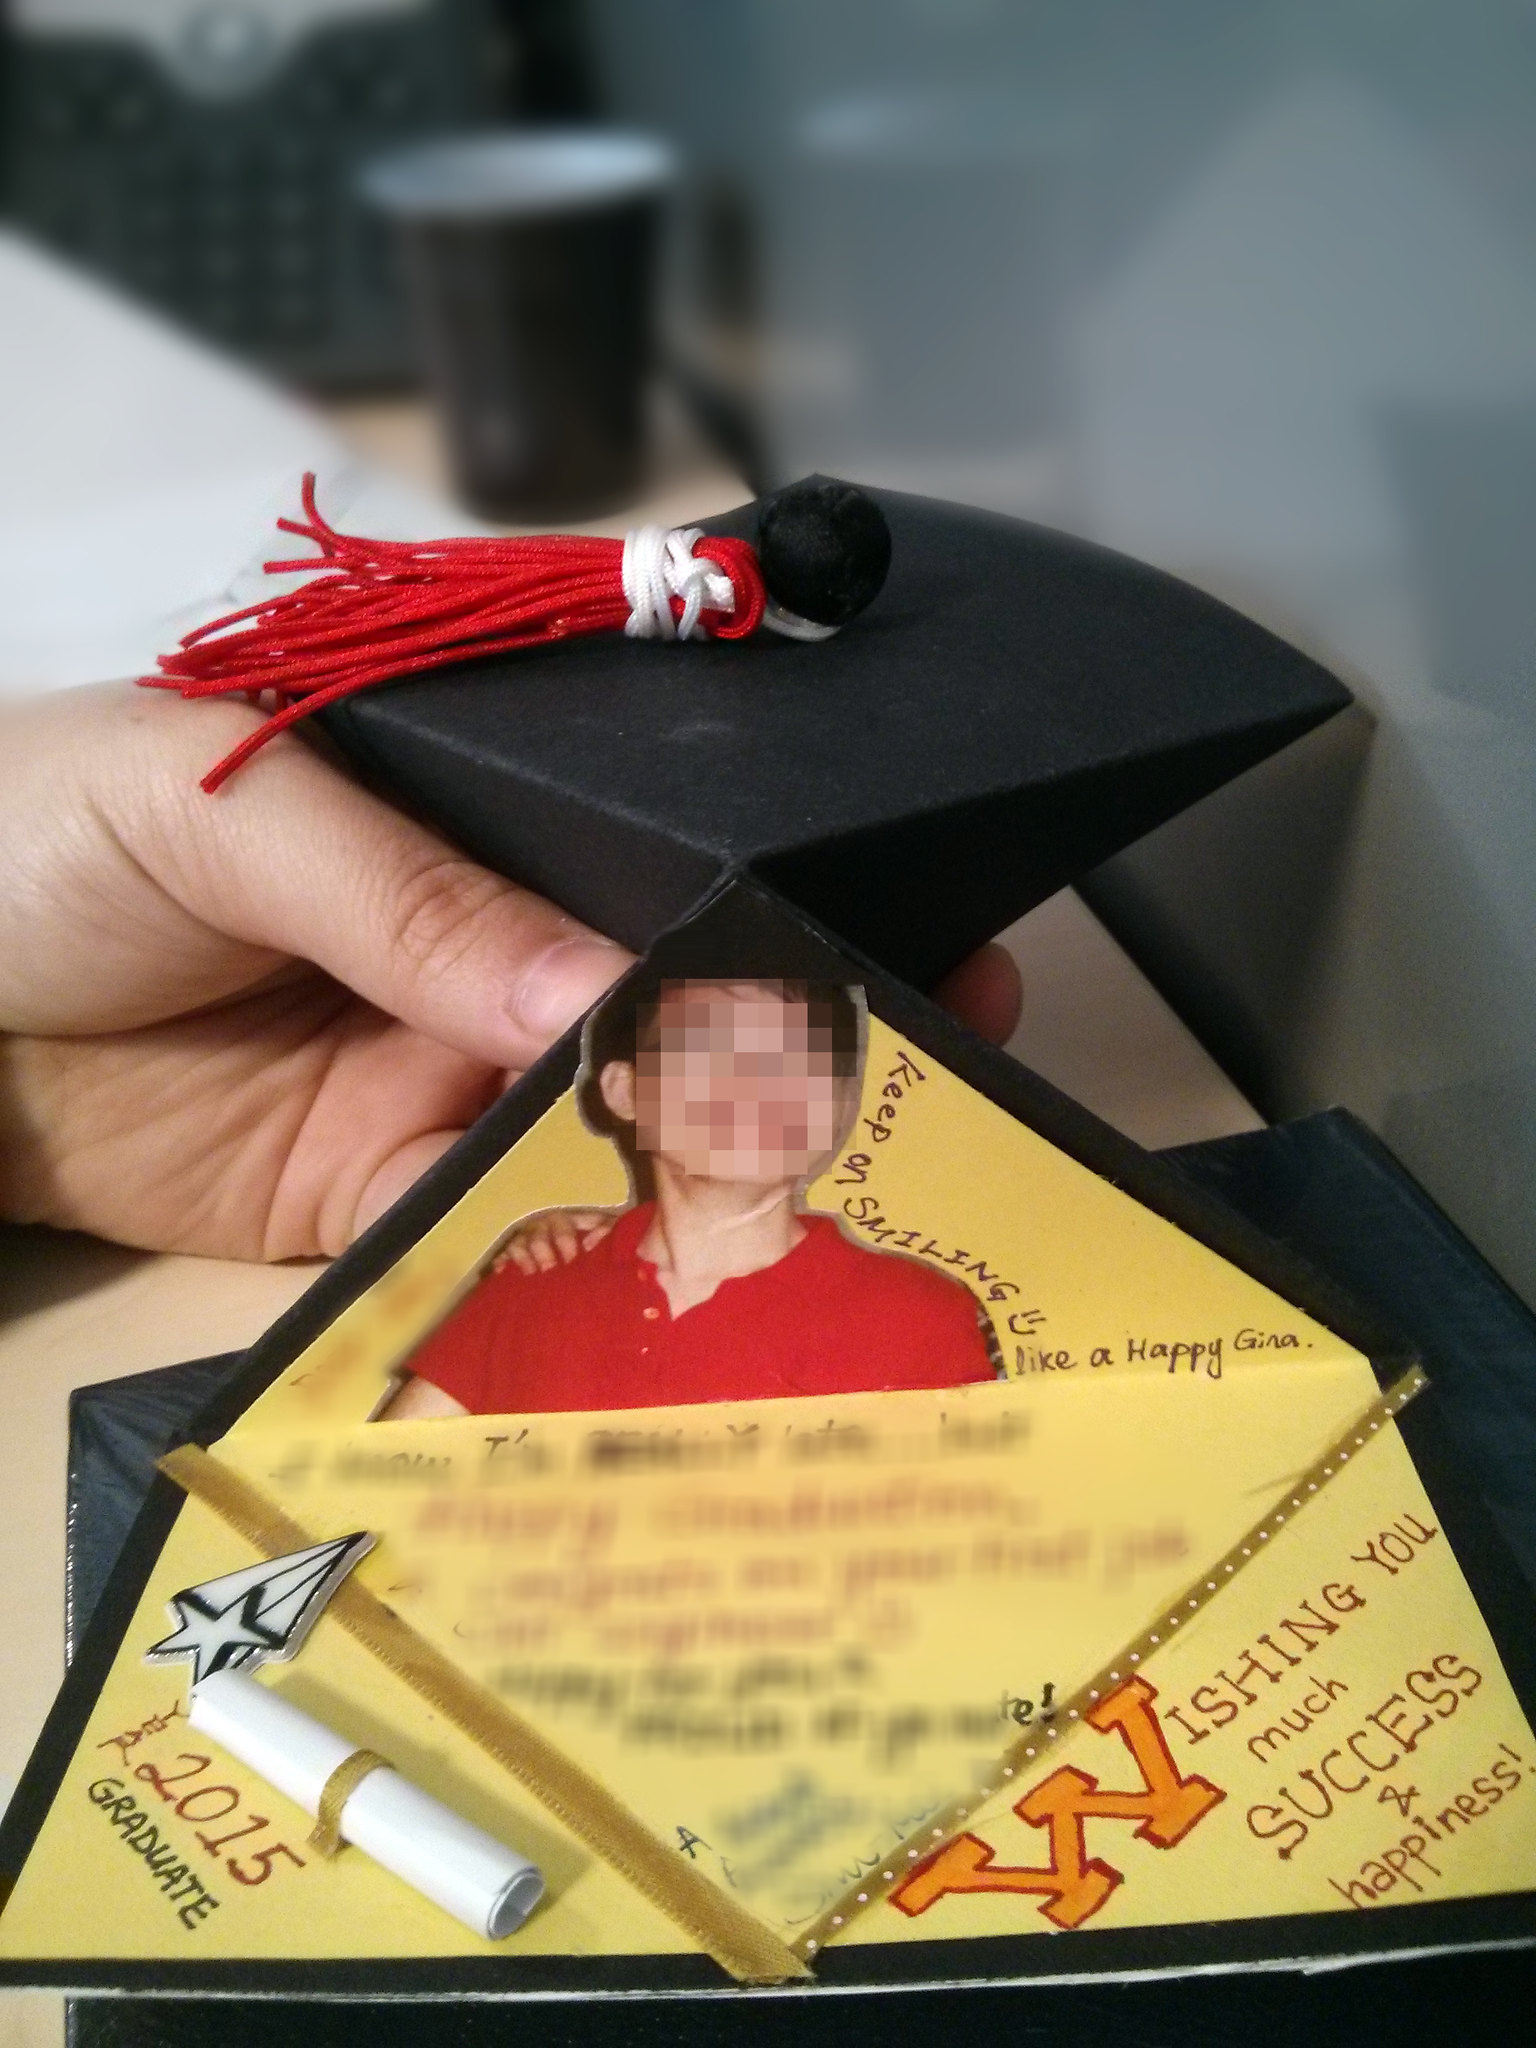

It isn’t as great as I envisioned, but still pretty close yes? That it looks like he has on the pop-up graduation cap? (Yes, the “W” is much like a CERTAIN American University of M, yes? *Wink*)
For the tassel part, I used a black round button, poked it with a piece of wire through the card and bend it then taped it down in the inner part of the card to keep it in place (simple superglue on the button to the card didn’t work). Of course, attach the tassel around it as shown. Of course there are many other (nicer) ways to execute this part! I was just working with what I had as I was out of town when I made this.


I also made a little bookmark that fit into the other side of the spring card as you can see. This personalized bookmark with relation to Newton and gravity was for a future Civil Engineer friend. It’s detailed personalization like these for a specific friend that you can’t always get from store bought cards (well, maybe if you look really really hard…. so isn’t it easier to just make one?). And yes, I thought about that gravity metaphor tied quote on my own, do you think it’s (dorkily) smart and cute? 😉
-
Graduation Inspired Block-Step Card
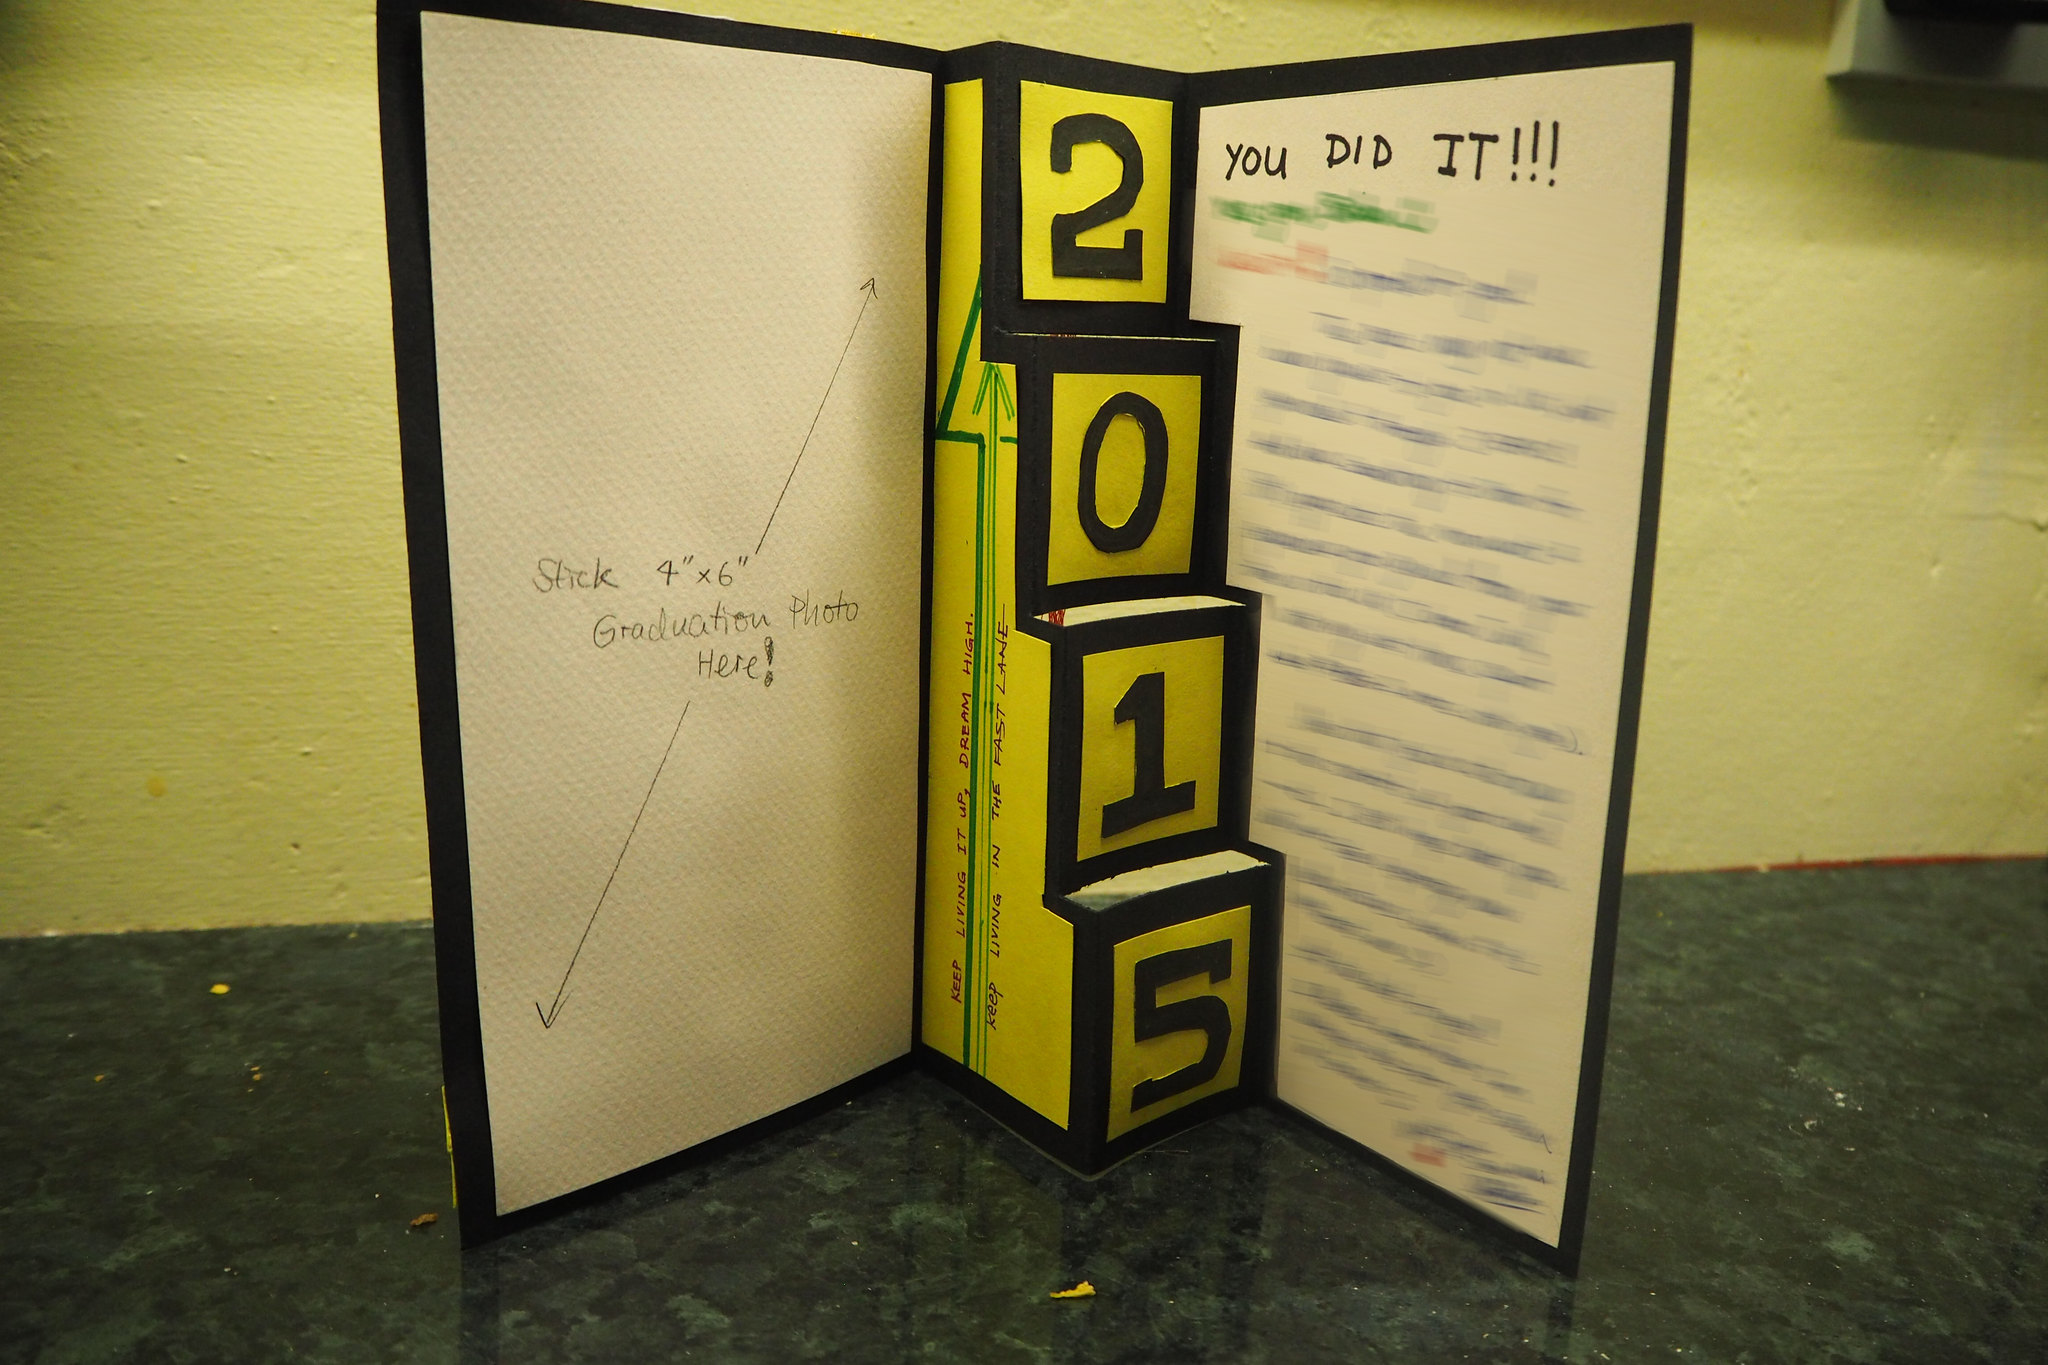
Well, I rarely (never, I think) recycle card ideas. I just want to keep trying new things and ideas (not only for card making)! So, I went Googling for any other graduation card ideas that spoke to me. This block-step card by Lori Whitlock (link here) did.
It was simple but intriguing and a pop enough to be worthy of a decorative piece on a mantel. I also thought it would make a great photo frame card.
In the tutorial Lori provides, she digitally creates the template and then machine print/cut it out. So, I had to figure out the dimensions, folds and cuts on my own for this one.

Materials:
A4 Craft Card *Thick card so that it can stand (I used A4 but A2 or A3 would be better)
Color Paper (for your desired design)
Blade/Knife
Glue or Double Sided Tape
Process:

- Draw and fold the craft card as illustrated with the dimensions in the picture above.
- Use a blade to make cuts on the horizontal lines.
- If you want to paste color paper on the step, blocks and all, measure and cut the color paper accordingly then paste them within the drawn lines.
- Fold the vertical lines: _wards for the left vertical lines; _wards for the right vertical lines
- The steps should float when you open the card and it should stand! Walla!
- On the outside, add the tassels for a graduation cap and rolled paper scroll.
- Use foam tape and clear plastic sheet to create a proper border for the photo frame (I would have done it if I had foam tape)*This side of the card (left) would need to be wider to allow space for the frame
*You can tinker with the dimensions of the steps on your own if you don’t want them sticking out when the card is closed like with Lori’s design (by making the 9cm side shorter).


-
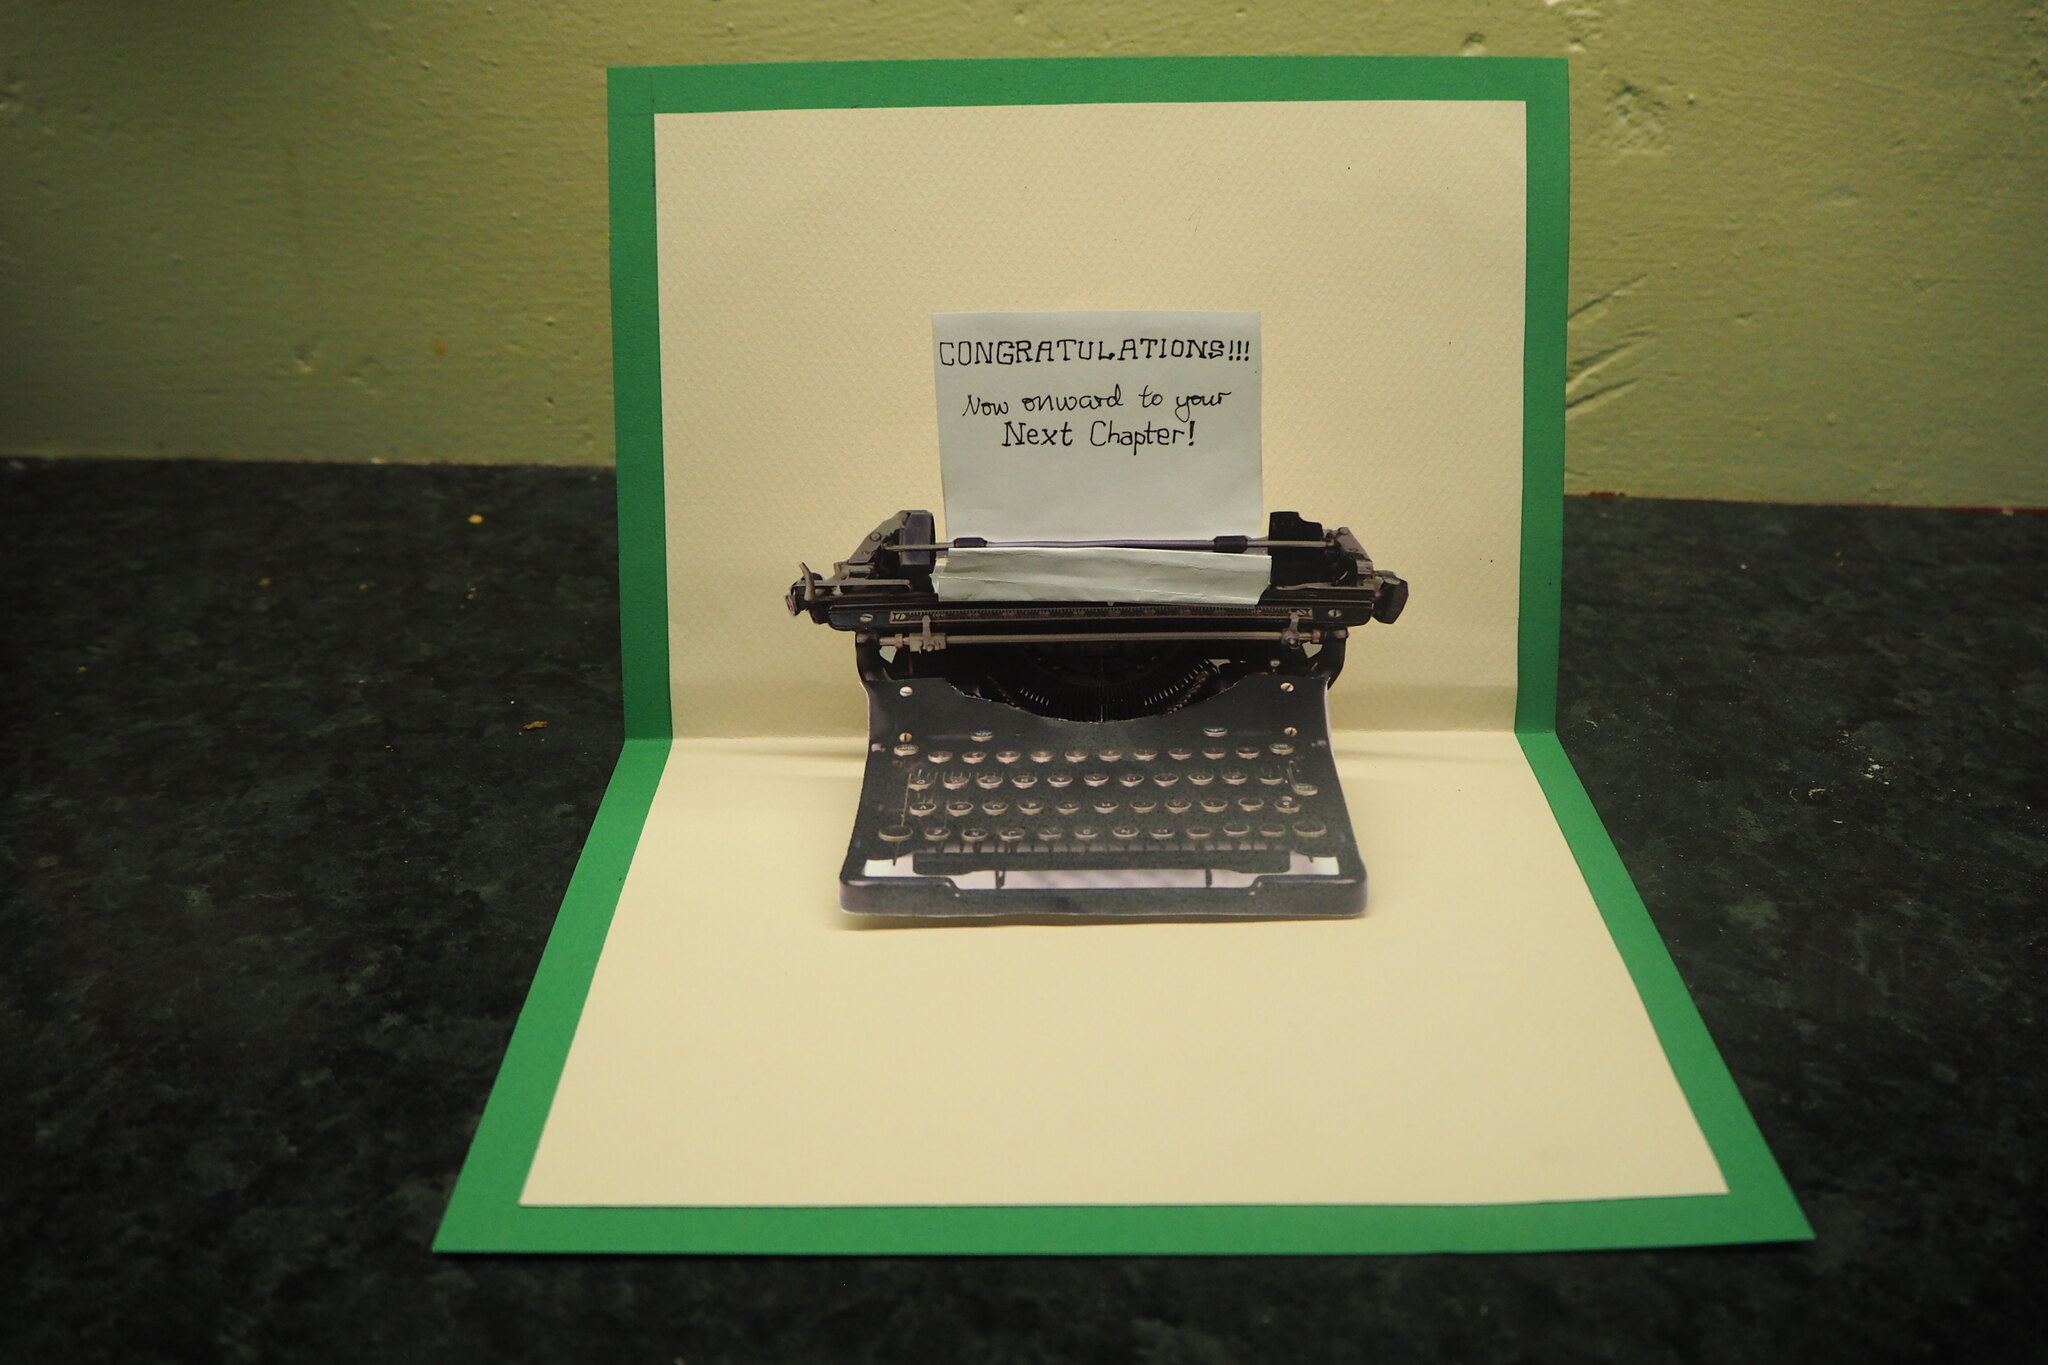
Typewriter Pop Up Card
As this was my third graduation card, I wanted to step outside the “graduation cap, black and scroll” format. This one friend of mine who was graduating with English with Film Studies degree is an aspiring creative writer… so I immediately thought about (associate that with) ink, quills and typewriters.
I came across two great ideas for pop-up typewriter cards on Google:
There is even a Polaroid pop up card for the first link (by Brit+Co) which I think is absolutely brilliant (and am bookmaking for future use!)!!
I was pretty swamped with work and planning my Europe trip… so I did not opt for drawing and cutting out a typewriter from scratch as the one in the second link. However, I did kind of adapt it to the simple first pop up.
Material:
2 Craft Card (of your choice of size and colours)
Scrap Paper
Computer and Color Printer
Blade/Knife
Process:


- Print and cut out a picture of a typewriter. This is the one I used (original picture link here)
- Cut the typewriter picture into two along the red line.
- Cut out the paper part (green outline) of the typewriter picture.
- Cut out a long piece of paper with the width that will fit into the typewriter paper hole (cut out part from step 3)
- Fold this long piece of paper as below so that it fits into the hole, and paste the lower part onto the back of the typewriter picture.
- Fold a piece of scrap paper into the spring pop up strip (like this Youtube tutorial here). This will create the pop up for the keyboard of the typewriter so that it is about 45 degrees instead of 90 degree pop up for Brit+Co’s tutorial.
- Fold another piece of scrap paper (2nd scrap paper). Glue one section of the fold to the card bottom and the other section to the typewriter keyboard (so that it forms a 45 degree) and the tip to the paper spring as pointed out in red.
- Use the blade to make vertical slits in the centre of your card: Slit length is about 3-4 times the length of the curved section of the typewriter, and distance between the slits is the width of the curved section.
- Fold the section between those slits inwards of the card.
- Paste the curved part of the top section of the typewriter picture to the inward fold (pop up) section of the card. Color the bottom in black so that it doesn’t stand out.

There you have it! My adaption of a 3D-typewriter pop up card! Customize the rest of the card with your personal wishes/message as you like.


What do you think of them all?
I hope my ideas helped and inspired you too! You could definitely adapt some of it to fit your desired theme/occasion! Happy crafting!
Comment if you have any questions (which I doubt any of you will), and feel free to link me to your inspired creations too! Share any ideas for better modifications or such too if you will!
And big congratulations to those graduating friends of yours!

Waiting for my square cap moment,
Sum.
